By: FiremanBob
Dry fire practice is not only the least expensive method of marksmanship training, it is also the most valuable. Every interview or article I’ve seen by a world-class competitor includes the point that he takes more than 100, sometimes even 500, dry-fire shots for every live round fired in practice. Whether you are a target competitor, a hunter, or a plinker (perhaps you bet your buddies you can hit that quarter at 25 yards, or that pop can at 100), dry-fire practice will make you a more accurate marksman.
So what does dry-fire practice do for you, and how do you do it? Essentially, dry-fire practice includes everything you do in shooting except for the noise and recoil of the live round. In practice, you are training your body and your mind to do everything perfectly, the same way, every time you shoot. If you want to put every shot through the same hole, you have to do everything the same way for every shot. Regular dry fire practice keeps your body and your mind “in the zone” so that when you go to shoot at the range, the whole process is a natural act which you can do almost automatically.
You need a good target. If you are practicing indoors, you probably don’t have 25 meters for your AQT. You can download scaled-down versions of a variety of Appleseed targets, including AQTs, at this link. Look for the room-size targets at Reply #4.
Depending on your rifle, especially with rimfires, you may need dummy rounds (aka snap caps). Ruger 10/22s can be safely dry-fired on an empty chamber. Other manufacturers advise against dry-firing their .22LR rifles. If you have any doubts, protect your firing pin and barrel. You can make a protective cushion for your firing pin from a small piece of a magnetic business card. It stays in place on the barrel, removes easily, and will last for many shots. Spring-loaded snap caps for centerfire rifles are widely available and inexpensive – they will protect your firing pin.
What do you work on in dry-fire practice?
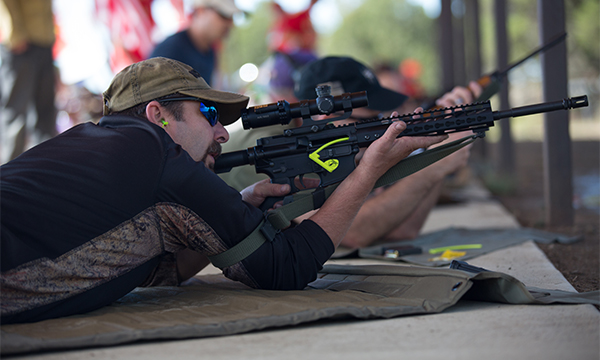
Steady hold factors: Get comfortable and efficient in building your prone, sitting and standing positions. Experiment to find the perfect sling length and make sure it’s consistently in the correct position on your arm and stays tight. (Once you find the perfect length, you can mark a line at the top of the slider with a Sharpie.) Also, experiment with your position so that you are comfortable and naturally have all of the steady hold factors right. Pay attention to your body – make sure you are relaxed and comfortable in your position.
Transitions for Stages 2 and 3: Get them smooth and consistent so you can confidently settle into your NPOA and get your first shot off within twelve seconds. Practice your magazine changes also. Smooth is fast; rushed is slow.
The 6 Steps of Firing the Shot: From sight alignment to follow-through, get each step perfect before moving to the next. Focus on the front sight/crosshairs. Make sure the sights do not move when the hammer drops. Follow through, holding the trigger back and maintaining your sight picture until you inhale your next breath.
Natural Point of Aim: NPOA is the ultimate refinement of position and the 6 Steps. Remember how to test your NPOA? Just before squeezing the trigger, close your eyes and take two breaths; then open your eyes. If the sights are not still on the X-ring, you are muscling the rifle onto the target. Adjust your position and check again until it’s perfect.
Here are some tips to get the most value out of your dry-fire practice:
The first rule of dry-fire practice: SAFETY. Make sure your rifle is safe, that your magazines are empty, and that you have no ammunition in the room where you practice.
Take the steps in order: First work on position/steady hold factors, then the 6 Steps, then NPOA
Start slowly. Musicians learning a new piece start slowly, getting each note and phrase perfect, and gradually bring it up to tempo. We should do the same.
Develop a routine: You want every aspect of your shooting process to be consistent, including how you arrange your mat, where you put your magazines, how you sling up and get into position, and how you use your preparation period.
Visualize: See yourself at your Appleseed or your match. Develop sensory (muscle) memory of your position, feeling the ground under your knees and elbows, and relaxing into the sling. See yourself transitioning calmly and smoothly. Be slightly surprised at each shot breaking, and see your shots appear in the V-ring on the AQT silhouette. See yourself ignoring the hot case that just hit your neck. The more realistically you visualize the actual event in practice, the more natural it will feel when you’re at the range.
How often should you practice? Frequent short sessions are best. You will do better in 15 minutes every day than an hour twice a week. Especially in the beginning, your muscles will get tired quickly and you don’t want fatigue to force you to compromise your position; nor do you want to embed by repetition any steps that are less than perfect.
In summary, if you do it properly, dry-fire practice will be of enormous value to your marksmanship. The fact that it costs nothing is the cherry on top.
FiremanBob, aka Bob Newton, is the author of a blog about Ruger 10/22s and shooting sports at www.1022Companion.wordpress.com

